Skycut Model D Series Cutter Parts Section
Dual heads cutting with HD sensitive touch screen Adjustable pinch wheels, pressure in 2 modes Multiple output options( including USB U-disk or WIFI )
 Audited supplier
In this video, we're going to go over the parts of the D model machine.
The control panel: Now the control panel is used to do so many things on your cutter. It's used of course, to move the blade holder or other tool to the origin you wish to use for your project. It can be used to set the pressure, speed, number of passes, number of repeats, and where the carriage moves at the end of a job. You can pause the cut, abort a cut, and even repeat a cut.
The control panel has a built-in calibration function for the camera. You can set up a Wi-Fi connection to your home or office network.
You can even customize the lighting and choose what happens at the end of a cut.
All of these various functions and more will be covered in later videos.
The blade carriage moves the blade holder left and right. When the cutter is powered off, you can move it by hand. But when the cutter is powered on, it could damage the cutter, if you attempt to move it. Thus, always use the control panel and the arrows to set the blade holder to its new location.
This is the blade holder or jaws, as they're most often called. They are used to mount either the blade holder or another tool into your cutter. Note that it doesn't matter which side is used with which tool. Settings can be made on the control panel and in the software, which will be shown in later videos.
Each pinch roller on the D model has its own lever to raise or lower that pinch wheel. The pinch wheels can be slid left to right in order to best position them for the material being cut.
These white rectangle labels indicate where the pinch wheels can be located so that they are over a rough roller at the bottom, which are called grit shafts. More about this is covered in a later video.
This entire side is referred to the right end cap. The other side is referred to the left end cap. Now the top also is sometimes called the cover or the lid. It can be popped open if the need ever arises for a particular repair.
Notice the light gray strip running from end cap to end cap. This is a cutting strip and the center of the blade holder seats directly over the cutting strip, which protects the machine in case the blade accidentally cuts too deeply. You will want to avoid getting cuts in the cutting strip, as it can eventually begin interfering with the quality of the cuts. But the cutting strip can be replaced if needed.
The power switch is located on the outside of the left end cap. Press the top of the switch to power on the cutter and note, that it does take a few seconds before the control panel lights up.
On the outside of the right end cap are the following from front to back. UART which is used to load PLT files from a flash drive in the event that it's more convenient than sending them directly from a computer.
A USB port - connects a USB cable from your computer to your cutter.
And a reset button, which can be pressed in and held for one, two, or three beeps. However, it is strongly advised not to reset your cutter unless told to by a tech support representative.
And this concludes your D model parts.
Audited supplier
The operation-- How to use Skycut CA310 screen protective film cutter
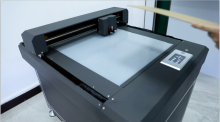
Skycut F4560 Flatbed cutter with deepcut blade cutting
Skycut cutting plotter uses U Disk Connection to work with the Signmaster
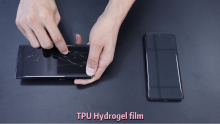
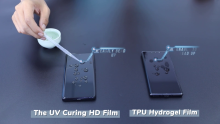
The UV Cured HD Film gives you a perfect protector with high transparency and high-response touch feeling.
Happy Christamas for Skycut team----Bring best wishes and joys for Skycut big family
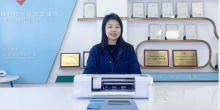
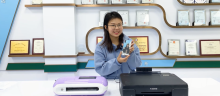
How to connect Skycut mini cutter with Cannon Printer to make customized back film
The UV Cured HD Film gives you a perfect protector with high transparency and high-response touch feeling.
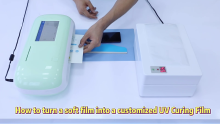
How to use a soft film into a custiomized UV cured film
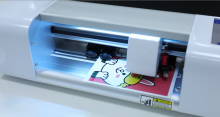
DIY your favourite back fil for your mobile phone