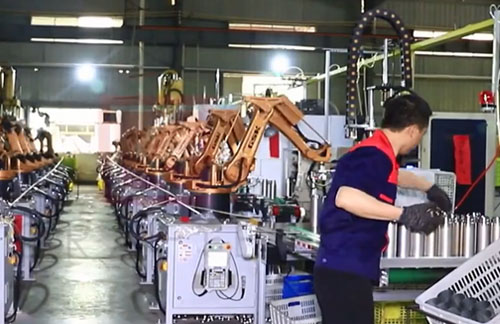
Stainless Steel Insulation Cup Production Process
In this side of the article, the process of making stainless steel insulated cups is introduced, containing 3 major steps and 34 minor steps.
1、Cut pipe
2、Water expansion
3、Segmentation
4、Expansion
5、Rolling the middle angle
6、Shrink the bottom
7、Cut bottom
8、Punching rib
9、Shell flat upper mouth
10、Punching bottom
11、Flat bottom mouth
12、Flat pipe
13、Roll on the corner
14、Flat upper mouth of inner liner
15、Rolling thread
16、Washing and drying
17、Inspection knocking pit
18、Butt welding
19、Testing water to detect leakage
20、With cup mouth
21、Welding mouth welding bottom
22、Spot welding
23、Press the bottom
24、Check the weld mouth welding bottom
25、Evacuation
26、Temperature measurement
27、Electrolysis
28、Polishing
29、Inspection polishing
30、Pressing outer bottom
31、Paint spraying
32、Inspection spray paint
33、Silkscreen
34、Packaging
 Audited supplier
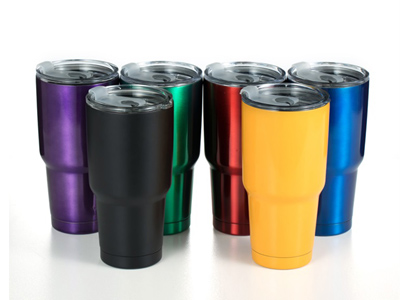
Insulation cup, simply put, is able to insulate the cup. Generally is made of ceramic or stainless steel plus vacuum layer into the container of water, the top has a cover, sealed tightly, vacuum insulation layer can make the internal water and other liquids to delay heat dissipation, in order to achieve the purpose of insulation. The current stainless steel insulation cup roughly production process is as follows; shell processing process, inner shell processing process, shell and inner shell assembly process.
Step One, shell processing process
Outer tube collar - cut tube - expansion - segmentation - expansion - roll in the corner - shrink bottom - cut bottom - punching - flat top mouth - punching bottom - flat bottom mouth - cleaning and drying - inspection and knocking pit - qualified shell.
Step Two, the inner shell processing process
Inner tube material - cut tube - flat tube - expansion - roll the upper angle - flat upper mouth - flat bottom mouth - roll thread - cleaning and drying - inspection knocking pit - butt welding - water test leak detection - drying - qualified inner liner.
Step Three, shell and inner shell assembly process
With cup mouth - welding mouth - pressure bottom - welding bottom - check welding mouth welding bottom - bottom spot welding absorbent - vacuum - temperature measurement - electrolysis - polishing - temperature measurement - inspection polishing - pressure outer bottom - spray paint - sampling temperature measurement - inspection spray paint - silk screen - packaging - finished products into the warehouse.

Brief description of the production process:
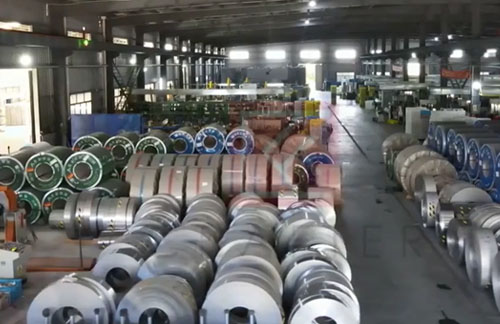
1、Cutting: use lathe, specifically according to the "cutting work instructions", require accurate size, timely detection of defective products, material waste, operation to avoid the production of pits, dents, pockmarks, scrap products.
2、Water expansion: use water to expand the press, specifically according to the "water expansion work instructions", require attention to focus, always pay attention to the product craters, size, shape is in line with the requirements.
3、Segmentation: Use the instrumentation car to cut the two shells of the water expansion, requiring accurate size, uniform cut, no gaps, burrs, and lightly avoid producing pits, dents, pockmarks, and scrap.
4、Expansion: use a large press, specifically according to the "water expansion work instructions", require attention, is the shell of the pipe welding place to correspond with the mold, always pay attention to the product crater, size, shape is in line with the requirements.
5、Rolling in the corner: use the lathe to roll the two corners of the concave shape of the shell through the expansion to meet the size requirements, to avoid pits, dents, pockmarks, scrap.
6、Shrink the bottom: use lathe, specifically according to the "shrinkage work instructions". Shrink the bottom of the circular arc of the shell through the expansion to meet the size requirements, to avoid producing pits, dents, pockmarks, scrap.
7、Cut the bottom: Use lathe to cut the bottom of the shrunken shell to the standard size, with uniform cut, no gap, no burr, lightly hold and lightly place to avoid pits, dents, pockmarks and scrap.
8, punching: in the small press the shell mouth of the welding seam flattened, in the welding mouth will not jump welding, so that the welding mouth smooth and uniform.
9、Shell flat upper mouth: use lathe, flat mouth evenly, no gap, burr, meet the requirements, take lightly, avoid producing pits, dents, pockmarks, scrap.
10、Bottom punching: use press, require concentration, always pay attention to the product crater, size, shape is in line with the requirements, especially pay attention to the bottom of the punching whether there are cracks.
11、Flat bottom mouth: use instrumentation car, flat bottom mouth evenly, no gap, burr edge, meet the requirements, hold lightly, avoid producing pits, dents, pockmarks, report products.
12、Flat pipe: use the instrumentation car, flat a pipe mouth, flat mouth evenly, no gap, burr edge, meet the requirements; hold and put gently, avoid producing pits, dents, pockmarks, scrap products.
13、Roll the upper corner: use the lathe to roll the protruding corner of the liner with good expansion until it meets the size requirements; take it gently to avoid pits, dents, pockmarks and scrap.
14、The liner is flat on the mouth: use the instrumentation car, flat mouth evenly, no gap, burr, and meet the requirements; take it lightly to avoid pits, dents, pockmarks, and scrap.
15、Rolling thread: use special thread machine, specifically according to the "Thread Rolling Operation Guideline", focus attention on adjusting the depth of the thread to meet the size requirements; take it lightly to avoid producing pits, dents, pockmarks and scrap.
16、Cleaning and drying: Clean and dry the inner liner and outer shell; take them gently to avoid pits, dents, pockmarks and scrap.
17、Inspection knocking pit: test the inner liner, shell is qualified, there are pits, dents knocking flat to meet the requirements, gently take and put.
18, butt welding: the inner liner and the inner bottom butt welding, specifically in accordance with the "butt welding work instructions" implementation, the requirements of the welding seam smooth, no holes, no pits.
19, water test leak: the welded inner liner inflatable water test, whether there is a hole in the weld, no leakage for qualified.
20, with the cup mouth: the liner, shell together, the cup mouth together flat; lightly held and placed to avoid pits, dents, pockmarks, scrap.
21、Weld mouth welding bottom: specifically according to the "welding mouth welding bottom process work instructions", the requirements to ensure that the bottom of the weld mouth weld through and round smooth, no bump, tumor and leakage of welding points.
22、Spot welding: spot welding on the suction agent in the bottom, note that the suction agent on the spot welding must go to the vacuum effect within 24 hours, otherwise it will be ineffective.
23、Press the bottom: press the cup with the welded mouth on the bottom of the spot welded absorbent, press and level the bottom mouth.
24、Check the welded mouth and bottom: check the cups with welded mouth and bottom, and pick out whether there is leakage, badly welded cups or other bad reasons.
25、Vacuuming: vacuuming without tail, in strict accordance with the vacuuming operation standards.
26、Temperature measurement: according to "Electric Temperature Measurement Process Operation Guideline", check whether the cups are vacuum, and pick out the cups that are not vacuum.
27、Electrolysis: send out the electrolysis to the outsourcing company, and require the cup to be bright and even, without watermark and yellow spot.
28、Polishing: require the cup shell to be polished in a delicate and orderly pattern, the cup mouth smooth and bright, no obvious drawing, scuffing, black silk and dents, polishing paste residue phenomenon.
29, test polishing: polishing the cup to meet the requirements, bad to re-polish, good flow to the next process.
30、Pressing the outer bottom: the polished cup pressed on the outer bottom, required to press flat.
31、Spraying paint: send out the outside spraying paint, color as the sample, the requirement of spraying paint evenly and firmly, no paint, pockmark, etc.
32、Check the spray paint: whether the painted cup meets the spray paint requirements, the bad ones should be repainted and polished, and the good ones flow to the next process.
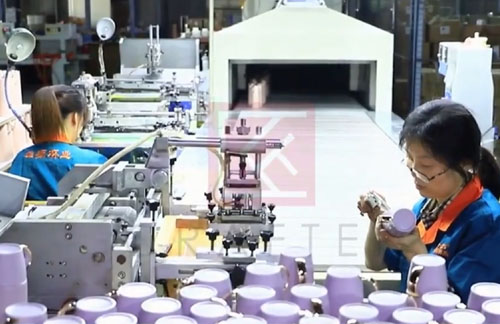
33、Silkscreen printing: screen printing on the trademark LOGO as required, to be clear, pattern logo, size, color, location as sample; screen printing label with plastic bags sticky, not easy to snap off with nails, so screen printing must need to bake over with baking channel.
34、Packaging.
Audited supplier
shanghai crafter 850ml 1200ml 1500ml tea hot water boil smart kettle stainless steel car kettle thermo flask factory
Shanghai Crafter Customization Vacuum Flasks & Thermoes Straw Vacuum 900Ml Water Bottle Termo Cup With Handle
Shanghai Crafter Wholesale Double Walled Stainless Steel Insulated Thermo Flask Vacuum Bottle Water Bottle Factory
Crafter 230ml Kids Water Bottle Double Wall Mini Beer Mugs Coffee Tumbler 304 Stainless Steel Water Bottles With Lid
crafter wholesale 12oz stemless insulated vacuum egg shape mug stainless steel custom wine tumbler cups with lid factory
Shanghai Crafter Customized Stainless Steel Vacuum Flask Water Bottle Insulated Sports Bottle Factory Supplier
Customized Shanghai Crafter Double wall stainless steel 304/201 thermos vacuum flasks manufacturers From China
Shanghai Crafter Custom Logo Portable Leakproof Vacuum Insulated Cup Stainless Steel Water Bullet Bottle factory
Best Shanghai Crafter Powder Coating Wide Mouth Stainless Bottle Factory Price - Crafter Drinkware


