SKYCUT D series cutter plotter Package Contents
2 years ago
433
Share
In this video, we're going to cover every single thing that you should have received in your model D package.
When you're getting the cutting machine out of the box, it may require more than one person to retrieve it.
Notice the two Styrofoam end pieces. You're going to want to take those off and store them in a place just in case you ever need them again for either storage or shipping.
You're going to notice two zip ties holding your housing unit in place. Obviously before any power is turned on, we do need to get rid of these. To remove these, we are not going to cut them from the front, as you can see that the black band is really close to those zip ties. Instead, we're going to cut the zip ties from the back.
On the backside with the zip ties present your pinch wheels may be in the way of the zip ties.
Before moving the pinch wheels, we want to make sure that the levers are pointed up. Then with both hands, we can move the pinch wheels. Once you have the pinch wheels moved, you are now free to cut the zip ties. Again, notice that there is no black band in the back, so we don't have any fear of cutting that band.
The cutting mat: The cutter comes with an A3 size mat, which needs to be used for any material where the blade will fully penetrate the material. Otherwise, when cutting materials like vinyl, paper label sheets, or HTV, no mat is actually needed because the backing sheets prevents the blade from cutting too deeply and damaging the cutting tip. Notice that you have a protective sheet covering your mat. Underneath that protective sheet is sticky material to keep your items in place while cutting. When your mat begins to lose stickiness, it can be washed in warm water with a little bit of dish soap and a soft brush. Once dry, the mat should be sticky again, but more re-positional adhesive can be added when needed.
The power cable plugs into your cutter and into a wall socket or power strip. Remember to always turn off your machine before you unplug the cable.
The USB cable: Now this USB cable can be used to connect the cutter directly to your computer via USB.
The D model comes with two test pens and extra refills. The test pen is useful when you're first learning where shapes will cut instead of using the blade and possibly damaging your cutting strip. The test pen and paper can be used instead to draw. Note, also, when you get ready to calibrate the cutter’s camera, you'll need both test pens for that procedure.
The blade holder: The blade holder is used to hold the blade. Be sure to watch the video on how to insert the blade and even more importantly, properly set the blade exposure based on the material that you are cutting.
There is a creasing tool which can be used for making score lines for boxes, pop-up cards, gift bags, and so much more.
Because the D model has two heads, you can mount the blade holder on one side and the creasing tool on the other side and have both processes perform without the cutter pausing for a tool change-out.
Your cutter comes with two red capped, 45-degree blades, which are used on material, such as vinyl, cardstock, HTV, paper label sheets, and other thin materials. It also comes with one blue capped, 60-degree blade, which is used to cut thicker materials, such as foam, magnetic sheets, thin chipboard, candle, wax, and PETG plastic.
And those are the contents of your cutting machine.
Comments
No comments received
Suppliers
Sunrise Electronic Technology Co., Ltd
 Audited supplier
4YRS
Building C, XinHang Technology Park, No.229, Qingshui Road, Wulian Community,Longgang District, Shenzhen 518116 China
Product details
Comments
Suppliers
Sunrise Electronic Technology Co., Ltd
Audited supplier4YRS
Building C, XinHang Technology Park, No.229, Qingshui Road, Wulian Community,Longgang District, Shenzhen 518116 China
You may also like

The operation-- How to use Skycut CA310 screen protective film cutter
Skycut F4560 Flatbed cutter with deepcut blade cutting
Skycut cutting plotter uses U Disk Connection to work with the Signmaster
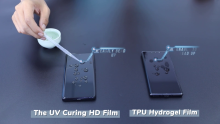
The UV Cured HD Film gives you a perfect protector with high transparency and high-response touch feeling.
Happy Christamas for Skycut team----Bring best wishes and joys for Skycut big family
How to connect Skycut mini cutter with Cannon Printer to make customized back film
The UV Cured HD Film gives you a perfect protector with high transparency and high-response touch feeling.
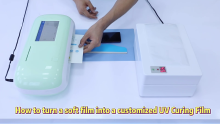
How to use a soft film into a custiomized UV cured film
DIY your favourite back fil for your mobile phone